Achieving a flawless makeup look goes beyond just having the right products; it hinges on utilizing the correct tools. Makeup brushes and sponges are indispensable for seamless application, blending, and creating diverse finishes. Understanding their unique characteristics and applications is key to elevating your beauty routine.
The Art of the Makeup Brush
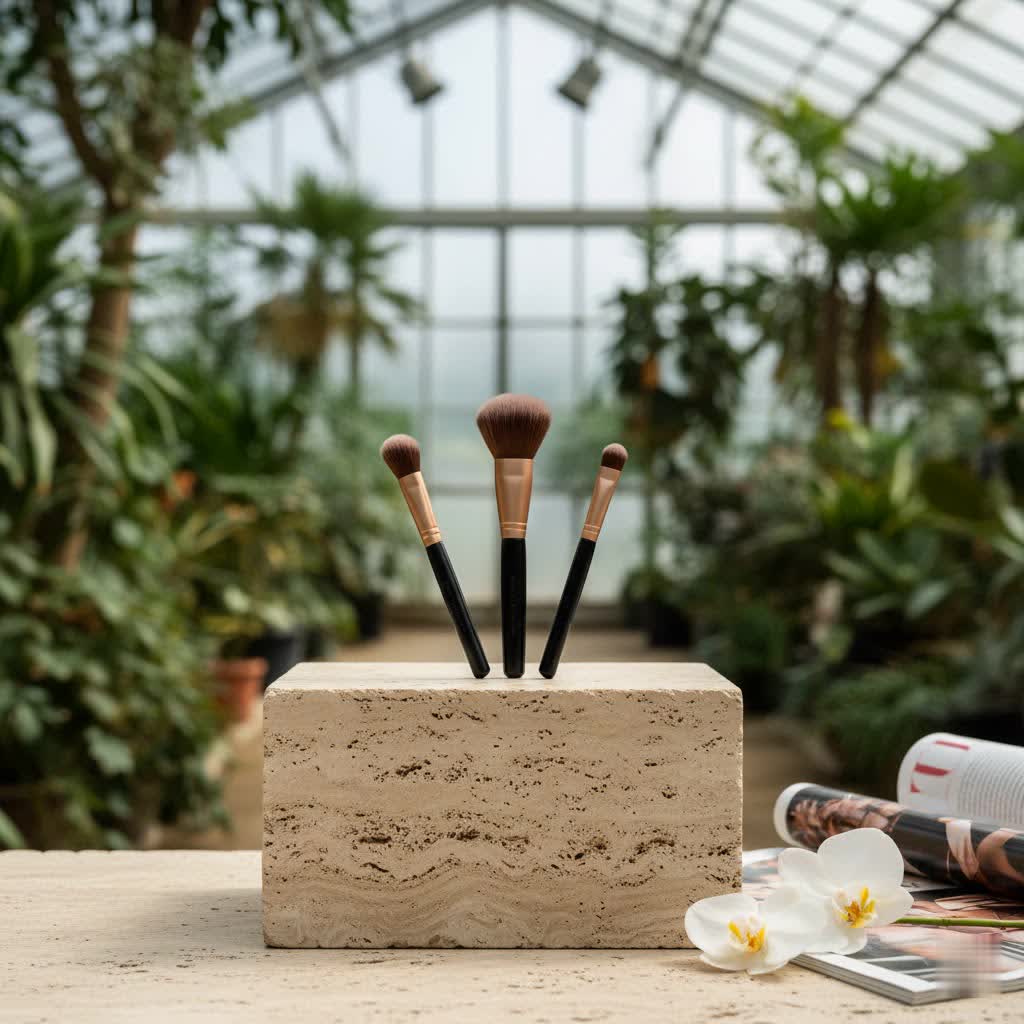
Makeup brushes offer precision, control, and versatility for a wide array of products and desired effects. They come in various shapes and sizes, each designed for a specific task.
Types of Makeup Brushes and Their Uses:
- Foundation Brushes: Available in flat, stippling, and kabuki forms, these are used for applying liquid, cream, or powder foundations, offering varying levels of coverage from sheer to full. Flat brushes are traditional for liquid or cream, while dense kabuki or stippling brushes provide more coverage and a buffed finish.
- Powder Brushes: Typically large and fluffy with a domed shape, ideal for evenly dispersing loose or pressed setting powders across the face for a soft, diffused look.
- Blush Brushes: Often medium-sized and fluffy, designed to apply blush to the apples of the cheeks, blending it seamlessly.
- Contour Brushes: Angled or tapered, these brushes allow for precise application of contour products to sculpt and define facial features.
- Highlight Brushes: Smaller, often fan-shaped or resembling an oversized crease brush, perfect for dusting highlighter onto the high points of the face for a luminous glow.
- Eyeshadow Brushes: Include flat brushes for packing on color, crease brushes for defining the eyelid crease, and blending brushes for softening harsh lines.
- Eyeliner Brushes: Fine-tipped or angled brushes used for precise application of gel, liquid, or powder eyeliner.
- Brow Brushes: Often double-ended with an angled brush on one side and a spoolie on the other, used for filling in brows and grooming them into place.
- Lip Brushes: Small, flat brushes designed for precise application of lipstick or gloss, allowing for defined edges and even color distribution.
|
Our Picks for the Best Makeup Brushes in 2026
As an Amazon Associate I earn from qualifying purchases.
|
||
| Num | Product | Action |
|---|---|---|
| 1 | LAURA GELLER NEW YORK Cosmetic Professional Makeup Brushes - Cruelty-Free - 05 Full Face Brush Set 5pc |

|
| 2 | EcoTools Sea Gems Cream Blush Brush, Liquid & Cream Blush Makeup Brush for Smooth Buildable Cheek Color, Dense Rounded Bristles, Sustainable Design, Vegan & Cruelty-Free, 1 Count |
|
| 3 | Flat Top Kabuki Foundation Brush By KESHIMA - Premium Makeup Brush for Liquid, Cream, and Powder - Buffing, Blending, and Face - 1.2\" Top Diameter |
|
| 4 | BEAKEY Makeup Brushes Set, Professional Foundation Eyeshadow Concealer Blush Powder Bronzer Applicator, 2 Blender Sponge with Beauty Paper Case |
|
| 5 | BS-MALL Professional Makeup Brush Set 18 Pcs Premium Synthetic Foundation Powder Concealers Eye Shadows Blush Makeup Brushes with Travel Case (Matte white beige) |
|
| 6 | BS-MALL Makeup Brush Set 18 Pcs Premium Synthetic Foundation Powder Concealers Eye shadows Blush Makeup Brushes with black case |
|
| 7 | BS-MALL Makeup Brushes Premium Synthetic Foundation Powder Concealers Eye Shadows 14 Pcs Purple for Makeup Beginner or Professional with Travel Case |
|
| 8 | 1/2 PCS Lymphatic Contour Face Brush for Sculpting – Anti-Puffiness, Detox & Lift, Improves Skin Glow & Absorption (1 Pcs Contour Face Brush) |
|
| 9 | MAANGE 20 Pcs Makeup Brushes with Gift Box, Double-End Multi-functional Makeup Brushes for Blending Liquid Powder Concealer Cream Blush Buffe,CoffeeBrown |
|
| 10 | Professional Makeup Brushes BS-MALL With Travel Case - Kabuki Brush Eyeshadow Brush, Concealer Brush, Blush Brush Bronzer & Foundation Brush 20 Pcs, Labeled Daily Use & Versatile Occasions Gift Box |
|
Bristle Breakdown:
Makeup brushes are made with either natural or synthetic bristles. Natural hair bristles are generally preferred for powder products as they pick up and distribute pigment effectively. Synthetic bristles, often made from nylon, are ideal for liquid, cream, and gel formulas because they don’t absorb product, ensuring more efficient application and easier cleaning.
Pros and Cons of Brushes:
Pros: Brushes excel in precise application, allowing for targeted placement and controlled layering. They offer superior blending capabilities for a smooth, airbrushed finish. High-quality brushes are durable, lasting for years with proper care, and are often considered more hygienic as they are easier to clean thoroughly and absorb less product compared to sponges.
Cons: Brushes can sometimes leave behind streaks if not used with proper technique or if the bristles are too stiff. Initial investment can be higher, and some natural bristles may be too abrasive for highly sensitive skin.
The Magic of the Makeup Sponge
Makeup sponges, famously popularized by the beautyblender, are celebrated for their ability to deliver a natural, dewy finish, especially with liquid and cream products. Their unique texture and application method provide a seamless blend.
Types of Makeup Sponges and Their Uses:
- Egg-Shaped Sponges (e.g., beautyblender): The most recognizable, designed with rounded sides for large areas of the face and a pointed tip for precise application around the nose and eyes. Best used damp.
- Wedge-Shaped Sponges: These have flat edges and bottoms, offering versatility for applying and blending liquid and cream makeup, especially useful for reaching facial contours.
- Silicone Sponges: Non-porous and designed to prevent product absorption, making them economical. They are solely for liquid or cream products and are very easy to clean. However, they don’t blend as effectively as porous sponges.
- Microfiber Sponges: Feature a velvety texture that works well for both liquid and powder application, delivering concentrated coverage.
Application Techniques:
Sponges are best used damp for most liquid and cream products. After wetting, squeeze out excess water until it’s just humid. The key application method is bouncing or tapping the sponge onto the skin, rather than dragging or swiping. This technique presses the product into the skin for a smooth, even, and “skin-like” finish, often thinning out foundation for a natural look.
Pros and Cons of Sponges:
Pros: Sponges provide a naturally dewy, skin-like finish and are exceptionally gentle, making them suitable for dry or sensitive skin. They excel at seamless blending, eliminating streaks, and are perfect for liquid foundations, concealers, and cream blushes.
Cons: A significant drawback is product absorption, which can lead to product wastage. Sponges require frequent cleaning (ideally weekly) due to their porous nature, which can harbor bacteria. They also have a shorter lifespan compared to brushes, typically needing replacement every three months. Silicone sponges, while economical, may not blend as effectively.
Brushes vs. Sponges: Choosing Your Perfect Match
The choice between a brush and a sponge often comes down to personal preference, skin type, desired finish, and the product formula.
- Consider Your Skin Type:
- Dry, Mature, or Sensitive Skin: A damp makeup sponge is often recommended as it’s gentle, prevents tugging, enhances hydration with water-based products, and avoids emphasizing fine lines or flakiness.
- Oily or Combination Skin: Brushes, particularly stippling or kabuki brushes, can offer a more matte finish and better oil control, allowing for precise application without adding unnecessary moisture.
- Desired Finish:
- For a dewy, natural, or sheer finish, a damp sponge is your best bet as it sheers out product and blends seamlessly.
- For fuller coverage, a matte finish, or precise application, brushes generally provide more control.
- Product Formula:
- Liquid Foundations: Both sponges (damp for natural, dewy finish) and dense synthetic brushes (for more coverage or control) work well.
- Cream Foundations: Brushes are often preferred as they can pick up the heavier consistency and distribute it evenly without absorbing too much product.
- Powder Foundations: Fluffy brushes are ideal for an airbrushed, soft-focus finish, easily buffing the powder into the skin. Sponges are typically not recommended for powder foundation as they can lead to a cakey appearance.
Many makeup enthusiasts employ a hybrid approach, using brushes for initial product application and then a damp sponge to press and perfect the blend for a truly seamless look.
Maintain Your Tools: Cleaning and Care
Regular cleaning of your makeup brushes and sponges is crucial not only for flawless application but also for maintaining skin health and extending the life of your tools.
Why Clean Your Tools?
Dirty brushes and sponges are breeding grounds for bacteria, product residue, dirt, and oils. Using unclean tools can lead to breakouts, skin irritation, and even infections, besides causing patchy or uneven makeup application and muddy colors.
How Often to Clean:
Dermatologists recommend cleaning makeup brushes every 7 to 10 days. Makeup sponges, due to their porous nature and contact with wet formulas, should ideally be cleaned weekly.
Cleaning Brushes Step-by-Step:
- Wet: Rinse the tips of your brushes under lukewarm running water, pointing the bristles downwards to prevent water from seeping into the handle and loosening the glue.
- Lather: Squeeze a small amount of gentle cleanser (baby shampoo, gentle shampoo, or specialized brush cleanser) into the palm of your hand. Swirl the brush bristles in your palm or on a silicone cleaning mat to create a lather and loosen makeup buildup.
- Rinse: Rinse the brush tips under running water until the water runs completely clear and no product residue remains. For densely packed brushes, gently spread the bristles apart to ensure a thorough cleanse.
- Dry: Gently squeeze out excess moisture with a clean towel and reshape the bristles. Lay brushes flat on a towel or use a special drying rack that allows them to hang upside down. Avoid drying brushes upright, as water can seep into the handle and compromise the glue.
Cleaning Sponges Step-by-Step:
- Saturate: Squeeze your dirty makeup sponge a few times under lukewarm water to fully saturate it.
- Cleanse: Pour a small amount of liquid cleanser onto the sponge and massage it in, gently squeezing and working the cleanser through to break down absorbed makeup.
- Rinse & Repeat: Rinse and squeeze out the excess water, repeating this process until the water running out of the sponge is clear. Add more cleanser if necessary. Avoid twisting or wringing vigorously, which can damage the sponge material.
- Dry: Leave the sponge on a towel to air dry completely in a cool, dry place before its next use.
When to Replace Your Tools:
- Makeup Brushes: Generally last one to three years, depending on material and care. Replace them if bristles become frazzled, stiff, start falling out, or if the brush loses its original shape and effectiveness.
- Makeup Sponges: Due to their porous nature and frequent use with wet products, sponges should be replaced every three months to prevent bacterial buildup and maintain optimal performance.
By understanding the distinct advantages and proper maintenance of makeup brushes and sponges, you can make informed choices that lead to a more effective, hygienic, and enjoyable beauty experience.